Wednesday, July 14, 2010

Basque Cake!

(Sorry this is such a long post, there's a story behind everything here. tl;dnr -- scroll down for the recipe and some pretty pictures.)

I've been meaning to make this recipe for a while. About nine months ago, it came up in conversation that a friend of mine was actually of Basque heritage. It just so happened that I had recently been at a meeting where I was served some of what was introduced to me as Basque Cake.
It was delicious, of course, with an interesting array of flavors, contained in a some kind of shortcake. It suddenly became my mission to make this cake for my Basque friend.
Call it a desire to reunite her with her heritage. Call it an excuse to bake.
I call it tasty.

The actual process of making the cakes (yes, always multiple) turned out to be somewhat of a journey. I found my first opportunity to make a Basque cake in April. There was to be a spectacular dinner, and I signed myself to contribute dessert (no surprise). The seed for Basque cake had been germinating somewhere in the back of my mind for several months at that point, but it wasn't yet ready to make its way into the world. First, I wanted to foray into the realm of cheesecakes. I decided to make a chocolate-chip cookie-dough cheesecake. Simple enough in principle, but delicious-sounding and complicated enough to keep me happy.

It was not to be. (Or was it? Come back in another month) One of the other cooks making a dessert had decided that *she* wanted to make cheesecake, and as I was (unsurprisingly) late in submitting my choice for dessert, I bowed out of the competition. Now I was stuck, because I didn't want to make anything resembling a cheesecake, and dessert number three was slated to be something cookie-like (it turned out to be cinnamon rolls). Suddenly, I was struck with the realization -- the something in between a cheesecake and a cookie could very well be a Basque cake.

The Basque cake, in theory, is a shortdough crust filled with custard and then covered with a top crust and baked, and as it bakes the custard and the crust intermingle and produce one solid cake-like delicious mass. This was my way out! I quickly looked around for a good recipe.

It turns out that this is actually quite difficult. Paraphrasing one location, everybody has their own Basque cake recipe, and each one is different. And it was true. Every recipe I found had some different interpretation of what a Basque cake was and/or how to make one.

I decided to synthesize a recipe. I made myself a custard, and a crust dough. I assembled my cakes, and I put the two of them in the oven, side by side, brothers on a tasty mission. I checked on them over the next hour or so, as the crust appeared to brown nicely, but the central custard remained unperturbed. Finally, it seemed to have reached some kind of edible consistency, like a pie. At the very least I could hope to cut it, and not have it ooze out from the sides of the cut.

I took my cakes out of the oven, one at a time.

Tragedy struck as I took the second cake. A carelessly replaced oven rack tilted as I pulled it out for better access to my cake. The springform pan I was using, having a low coefficient of friction as any good pan should, started on its own, unintentional journey out of the oven. As it picked up speed, time slowed down. I heard it slide down the rack, looked down, tried to grab the cake with one clumsy oven mitt and the rack with the other, succeeded in neither, and jumped back just in time to get oven-hot custard all down the front of my pants.

I struggled to get the rack back in the oven, all the while aware that there was scalding-hot food just millimeters away from my skin. I was informed by onlookers and helpers that I should remove my pants. But the cake was too important. I grabbed the springform from the floor (where it had actually landed face-up -- crust empty of custard, but face up -- small miracles) and tried to figure out if I could scoop custard into the empty shell. But it was all either on me or on the floor, and mostly all undesirable.

The custard on my pants cooled actually pretty fast, so I had a tasty, portable snack (I had just done laundry, okay?) while I figured out what to do with the remains of my eviscerated cake. At the suggestion of another kitchen occupant, I made some whipped cream, spooned it into the cavity, and sprinkled blueberries on top. It looked beautiful, but it covered a heart of lies.
Fortunately, one of the cakes was still whole, so I served two different kinds of desserts that night -- a Basque cake intact, but with sadly very liquid custard, and a whipped cream pie in a cake-shell.

My Basque friend never actually made it to dinner.

When I set out a second time to make these cakes, I had learned from my mistakes. I used new parts of recipes and changed some, changed the amounts of crust and custard in proportion to each other, played around. What came out was just about enough for four cakes (though I only made three). I have halved the recipe here, so that you may enjoy smaller portions than I burdened myself with (it took me a week and a half of making cakes every few days to exhaust my supply of dough and custard).

Without further ado, I present you my interpretation of the Basque cake:

Custard:

4 cups milk
Vanilla (2 beans, if you have them, otherwise extract works fine)
1-1/2 cup white sugar
6 egg yolks
1 cup flour
1 tsp. salt
1/2 cup butter
Flavorings


A quick note: These ambiguous "flavorings" I mention are any number of things that are supposed to be added to the custard and/or the crust to give it that special Basque flavor. Most often they include some kind of orange flavoring, as well as a spirit of sorts, whether it be rum, brandy, or Armagnac (a type of brandy from the Armagnac region in France). I rifled through what leftover alcohol was in our pantry and pieced something together. Don't worry too much about what goes into it, as long as you feel the flavor is sufficiently deep but citrus-y. You will need anywhere from 1 tbsp. to almost a cup of the liquid, depending on how strong you want the flavor. I kept it to a rough couple of tablespoons.

To make the custard, put the milk on the stove (careful with the selection of pot size -- when milk foams it nearly triples in volume for a moment, so try to avoid overflow) and add vanilla extract. If you have vanilla beans, split them open and add to the milk instead of extract. Bring to a boil. (If you are using beans, once the milk reaches a boil, take it off heat, fish out the beans, and scrape the insides into the milk, discarding the husk afterward.) Meanwhile, whisk together the egg yolks and sugar until it turns a lovely pale yellow color. Combine the flour and salt, and then add that flour to the eggs/sugar and whisk until smooth.

Now the fun part. Add the milk (and vanilla) to the egg mixture. The milk is going to be a lot hotter than the eggs, so in order not to fry the eggs immediately upon contact, you must start with small amounts of the hot liquid, whisking the entire time, until the temperature of the egg mixture starts to raise to the point that pouring more of the hot milk in won't leave you with a scrambled-egg custard. (This is called tempering)

Once the two are combined, place them back on medium heat, stirring often, until the mixture becomes thick. At that point, add the butter (in small chunks) and the 'flavorings' to the custard. Stir until the butter is melted.
While it is still warm and pliable, pour the custard into a shallow dish, and cover the surface of the custard with plastic wrap, pressing carefully to remove the largest of air-bubbles inside.

Refrigerate the custard.
This is what it looks like once it has reached custard-hood:


Crust:

2 cups finely-ground almonds
2 cups AP flour
2 tsp. baking powder
1/2 tsp. salt
1-1/2 cup butter
1-1/2 cup sugar
4 eggs
1 tsp. almond extract
citrus zest (optional)


One of the recipes I used called for almond meal, and not having that, I put almonds in a food processor (okay, I'll be honest, a blender) and ground them into a fine powder. Be careful with this, though, because the almond is not entirely dry, and so you will start to get clumps of what is almost a paste, and it will be hard to completely pulverize all the almonds. I recommend getting the almonds down to a moderately fine consistency and then mixing in a bit of the flour before taking it down to almond-meal fineness.

Combine the flour, almonds, baking powder, and salt. Set aside.
Cream together the butter and sugar, as if you were making cookies. Add the eggs and then the almond extract. (If you're like me, you might also add vanilla extract. There is nothing that vanilla cannot go into) If you want an extra citrus-y flavor, add a teaspoon or so of lemon or orange zest.
Slowly add the flour mixture. You should have what seems to be, for all intents and purposes, a cookie dough. Put it in the fridge to cool (or the freezer, if you're super-impatient, I suppose. Just don't forget about it).

Putting it all together:
Preheat an oven to 350 degrees. Grease a 9-inch pie tin. This pan worked so much better than the springforms I used the first time.
The dough is exceedingly buttery (read: delicious) so you'll have to be both swift and cautious with this part. Pull off about a quarter of the dough (remember, this recipe makes about two cakes) and roll it out to about 1/4-inch thickness. (It helps so much to roll between two sheets of plastic wrap. It doesn't stick to the rolling pin or the rolling surface.) You should have enough surface area to cover the bottom and sides of your pie pan. If the dough seems to warm and pliable, stick it back in the fridge for a few minutes. Lay this rolled dough into the buttered pan. Carefully press it down into the pan, filling all the edges without breaking the dough. It will probably come up over the sides. This is perfectly fine.
Prick the bottom of the dough with a fork as if you were making a pie. It will help the custard and crust come together more nicely.

Take about half of the custard you prepared and put it into the pie shell you have created for yourself. Take care not to make it too deep (unless you really like custard, of course). About 1/2-inch deep works well. (Don't worry about filling the pie shell all the way to the top)

Note: You don't have to (and may not) end up using all the custard you made. When I made this recipe, I gave about a third of the custard to Chef A for Nanaimo bars and still had enough for three cakes. Custard is a) delicious all by itself and b) good in many other recipes.

This is your cake at this point:


Now take another 1/4 of your dough and roll it out again, to about 1/4-inch thickness. (You may have to throw this one in the fridge as well) Lightly prick the surface of the dough with a fork, then invert it onto the waiting cake-shell-filled-with-custard. Press out all air bubbles, then crimp the edges of the cake, cut off excess material, and pop that baby into the oven. If you want to (and I recommend it) cover the edges with foil to prevent them from burning/browning too quickly.

Cook 20-30 minutes, then go in with a sharp knife and make a couple of cuts in the surface to release steam. Return to the oven.
Let it cook for another 15-20 minutes. The crust will turn golden brown and look deliciously crispy. Like so:

Remove from oven and let cool. Voila!

P.S. My Basque friend didn't get any of this cake either -- oh well, I guess I'll just have to make it again~!

Thanks for bearing with me,
~Chef G

Sunday, July 4, 2010

High Time for Pie Time? Banana meringue pie

I love pie; it may be my favorite dessert category. I grew up not liking chocolate - I mostly credit or blame my super-chocoholic family. Whenever we would go out to eat, the majority unwaveringly ruled in favor of the most chocolatey, richest item offered. Not being so fond of the brownish-hued delicacy to begin with, you can understand my frustration while facing dinner after dinner followed by molten chocolate cake and brownie fudge sundae and chocolate mousse and triple-chocolate chunk ice cream and double chocolate chip cookies and... Well, you might think I'm crazy; most people do have an odd reaction when I tell them I'm not terribly fond of it. To this day, given the choice between a chocolate sweet and a cocoa-free treat, I'm as likely to pick one as I am to pick the other. I've grown to appreciate chocolate, but I still cannot tolerate dark chocolate; I much prefer white and milk chocolate.

I certainly bake with a lot of chocolate, as you can see, but that's largely due to the fact that 1) our kitchens almost always have chocolate in some form, 2) fruits are rarer in the quantity in which we use them and 3) the universe seems to start salivating when any of the senses detect a hint of chocolate. Even scientifically, the genus of the chocolate tree - Theobroma - translates to "food of the gods." I suppose, every time I make a dessert with chocolate, and my housemates and friends devour their offering, they reach closer to godliness. I believe I can come to terms with that, more or less.

Oh, but I've digressed so far away from the topic of choice - pies - that I must take a moment and breathe deeply and imagine a delectable slice of a lattice-worked, steaming, sugary masterpiece. Fruit pies, in my opinion, are the pinnacle of mouthwateringly-delicious non-chocolate desserts. The flaky crust, the gooey fruity filling, the crunchy top crust, the meringue, the whipped cream, the paired ice cream... I adore it all.

[Oh God, it's now past 2am and I'm so into this post that I'm famished, and the only option for me right now is a flourless chocolate cake made yesterday. If there exists a cake that is more chocolate-y, I've yet to meet it. Even with my blooming tolerance for chocolate, I'm rather terrified of that cake. Someone send me a slice of fruit pie through the interwebs right now!]

Back to pie. Specifically, Banana Meringue Pie. The idea for this came from a good friend, actually. Her mother and brother were coming to visit our area, and her brother had requested a banana pie. Immediately, we were drawn to banana cream pie, but after snooping around on the interwebs, we found a meringue pie. Lemon meringue pie is amazing, both to eat and bake, and despite my inability to properly whip egg whites for anything else, I have had remarkable success making meringue. The filling part is generally more problematic, though, but for this recipe, I increased the cornstarch because the innards are always more liquidy than any pie should be. I was also intrigued yet wary of the separate banana slices and pudding, but I think the end result was rather satisfying. The crust used here is my go-to pie crust recipe, as it's flakey and forgiving and filled with Crisco. If you're not a fan of crisco, butter can be used in its stead, but will of course give you a different taste and consistency.

For the crust:
Ingredients:
1 1/4 cups flour + some for rolling
1/2 teaspoon salt
6 tablespoons + 1 teaspoon shortening
About 1/4 cup water
----
Preheat oven to 375*F.
Mix together flour and salt. Knead in the tablespoons of shortening to the other ingredients until crumbly. Add in the water slowly, while massaging the dough, until it forms a ball. Barely knead the remaining teaspoon of shortening in, so that some streaks of fat still remain; this will make the dough flaky and light.
Roll the ball between two sheets of parchment or waxed paper, or if you're desperate and live in an under-stocked kitchen, plastic wrap will suffice. The dough is pretty easy to work with and rather forgiving, so you should easily be able to make a 12" circle, a standard diameter for a 9" pie. Remove the top sheet, and flip the crust into your pie dish. Press the dough into place, making sure in settles into the pan, and then remove the other sheet. With a knife, remove the excess crust on the edges, and then poke holes in the crust with a little fork. And then hug a spoon, because it's feeling lonely and left out of the utensil-love.
Bake the pie for 10-15 minutes, until it's a light golden brown.

For the filling:
Ingredients:
1 cup sugar
3/8 cup cornstarch
1/4 teaspoon salt
3 cups whole milk
4 egg yolks, beaten (reserve the whites for later, they'll go into the meringue)
3 tablespoons butter
1 1/2 tablespoons vanilla
3 ripe to overripe bananas, peeled and sliced in 1/4 inch segments
----
Combine sugar, cornstarch, salt, and milk in large sauce pot. Whisk together and cook over medium heat until mixture thickens and slowly releases the bubbles. Cook on low for another two to three minutes. Pour a small portion of the milk mixture into the beaten egg yolks to temper them; stir together, and then add yolk mixture to remaining milk mixture. Return the pot to medium-low heat for two to three minutes, stirring constantly. Remove from heat, and add in butter and vanilla, stirring until smooth and well-combined.
Cover the crust's bottom with a single layer of bananas, and scoop a small portion of the pudding - enough to fill the spaces between the bananas and barely cover the bananas - into the crust. Add another layer of bananas, and once more scoop a bit of pudding on top. Continue until out of pudding or near the top of the crust (leave at least 1/8 of an inch of crust exposed, so that the meringue can fill the space and form a seal). If you end up with extra bananas, layer them on top of the pudding and gently press down. Set aside the pie.

For the meringue:
Ingredients:
4 egg whites (reserved from earlier, approximately room temperature)
2 teaspoons vanilla
1/2 teaspoon cream of tartar
1/2 cup sugar
----
Preheat oven to 350*F.
Add egg whites to a large mixing bowl. Beat with electric mixer on medium speed until bubbled and frothy; now add the vanilla and cream of tartar. Continue beating until glossiness develops, then slowly add sugar to mixture. Beat another 4 minutes or so, until stiff peaks form - when the still beaters are removed from the batter, the shape is maintained. It's important not to overbeat the meringue, as it then has the potential to collapse, but I've never had serious issues with pies failing. Yet.
With a rubber spatula, cover the pie with the meringue mixture. Be sure to completely cover the pudding, 'sealing' it in with the meringue and the crust's edge. I like to create a gentle curve, and then I take the spatula and gently 'slap' the whipped egg whites to create the peaks characteristic of meringue pies. Repeat this a few times (don't overdo it!) until small peaks cover the pie.
Slide pie carefully into oven and bake 12-15 minutes, turning once. When the meringue has turned lightly golden at the tips, remove and cool to room temperature, then move to refrigerator. Keep uncovered to prevent the meringue from weeping; if it does, don't fret too much. I think the caramel-colored tears are actually quite pretty and tasty. Maybe that's just me, though.

Apologies for the lack of photos! As I mentioned, I made these with a friend for her family, and so I unfortunately couldn't snag any finished-product photos.

~ The Baker's Apprentice/Chef A

Wednesday, June 30, 2010

Banana-nana Bread

So, I've now made this recipe twice, and am about to make it a third time. The wonders of buying quickly-ripening fruits in large quantities for an uninterested house.
Anyway. This recipe is rather simple, and quite tasty. I've been tripling it, but again, we have a huge house and a mammoth supply of bananas. Or enough bananas to fill a mammoth. Whatever.
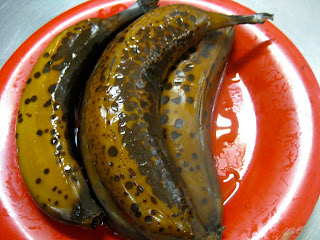
Bananas only a mammoth would eat. No worries, these didn't get used.
Ingredients:
1 cup + 2 tablespoons + 2 teaspoons all-purpose flour
1 cup + 2 tablespoons + 2 teaspoons whole-wheat flour
1 teaspoon baking soda
1/4 teaspoon salt
1/2 cup butter, softened
3/4 cup brown sugar
2 eggs, beaten
2 2/3 cups mashed overripe bananas
2 tablespoons + 2 teaspoons sour cream
Splash vanilla
Butter/Crisco/Fat of choice for greasing
Additional optional goodies: cinnamon/sugar mixture, chopped walnuts, chocolate chips, nutella
----
Basic Banana Bread:
Preheat oven to 350* and lightly grease a loaf pan or muffin tins
In a large bowl, mix the first four ingredients. Create a well in the center.
In a separate bowl, cream the sugar and butter until fluffy, adding the eggs gradually. With the beaters on medium, add in the bananas, sour cream, and vanilla, scraping the sides with a spatula occasionally. Mix until well blended.
Pour the wet mixture into the dry goods, and mix just until incorporated. This is crucial - overmixing will lead to denser, drier bread while undermixing will create surprise flour-clumps of doom.
Once mixed, pour into the greased loaf pan, and pop into the oven for 60 or so minutes, until a toothpick comes out clean. I turn mine around a little more than halfway through baking, but our ovens are not so kind.
Once out of the oven, let cool for 15 minutes, then run a butter knife around the edges, flip onto a cooling rack, and remove pan. Or you can just run the butter knife around, and serve it in the pan to your hungry housemates. Which, to be honest, is what happens for me.

Special Breads:
If adding walnuts, add about a cupful to the dry ingredients.
If adding chocolate chips, coat them in flour, add about a cup-and-a-half once the wet and dry ingredients are mixed. Once poured into the pan, add chocolate chips on top of the batter.
If adding cinnamon, sprinkle some on the greased pan, and add 1 tablespoon to the dry ingredients
If adding Nutella, pour half the batter into the pan, drop teaspoonfuls over the batter, run a knife through it, and then add the rest of the batter.
If adding peanut butter, follow Nutella directions, directly above.

~ The Baker's Apprentice/Chef A

Edit: Pictures added, as well as some additional "special breads!"

Thursday, June 17, 2010

Absurdly Easy Chocolate Fudge


Summertime, for me at least, means fudge. It doesn't require baking (and heating up the kitchen), and I prefer it when it is stored in the fridge. I actually made this on the 14th for a friend back home. I sent off most of the fudge, and have reports that it kept wonderfully on its journey, and is now mostly gone. Quick consumption: the mark of a job well done. Yay!
This recipe is for chocolate fudge at it's simplest. Hopefully, when I gain access to more ingredients, I'll do a rocky-road fudge (my personal favorite), or a chocolate-swirl, or a peanut-butter-swirl... The possibilities are endless, which I think is part of the reason I adore fudge so. I made 1.5 times what the recipe called for, but that was only because we ran out of chocolate chips. Tragedy!

Ingredients:
1 1/2 cans (14 oz each) sweetened condensed milk.
6 tablespoons butter, softened
4.5 cups semi-sweet chocolate chips (or any kind of chip, really. The chocolates, peanut butter, butterscotch, etc. It's up to you!)
2 teaspoons vanilla extract
----
Firstly, prepare your mold for the fudge. I used a deep cookie sheet because I like thin fudge and I couldn't find a clean casserole pan. Butter the surface, and cover the sides with a nice large piece of plastic wrap. The butter helps keep the wrap in place while pouring, and the plastic makes fudge extraction easy.
Fix a double boiler, making sure the water doesn't contact the top pan, and that the water just lightly simmers. Combine the condensed milk and butter, stirring until the butter melts. Add in the chocolate chips gradually, mixing until the chips melt. Once liquified and to the softball stage, pour in the vanilla, and just mix until incorporate. Watch that it doesn't seize, but I had no problem with that.
Pour the fudge into the mold, lightly shaking the pan back and forth to evenly spread the fudge. Put in the fridge for at least two hours, until set. After it sets, it should be good if left out at room temperature, but if the weather is particularly warm, just keep it in the fridge.

~The Baker's Apprentice/Chef A

Edit: Picture added, and a Rocky Road fudge recipe might be coming up shortly, since we now have marshmallows and walnuts stocked. Get excited!

Sunday, May 2, 2010

Rainbow Cupcakes

So, this recipe is more about presentation than anything special, taste-wise. My co-baker might disagree wildly, but these little cakes were all about the coloring, with a nice enough flavor, but nothing mind-blowingly awesome.
As you can see, however, the colors themselves were UNBELIEVABLE, so all-in-all, these are definitely one of my favorite things we've baked so far. I'm particularly proud of the green, which I supposedly over-dyed, but it's so PRETTY! So vibrant and happy and cute and completely nom-able.
And now the truth comes out. I'm not really sure what the recipe was. We made a simple, light-colored vanilla cake batter, divided it into seven bowls (although we ended up making six colors for the "rainbow" and just had fun with the last batch). For each, we added quite a bit of food color, mixed it in, and dolloped a bit in each cupcake cavity. By repeating this process, we got the vibrant separate layers. The "reverse rainbow" arch was simply a result of the blobs not layering out perfectly, and each addition sank in a bit rather than resting on top. I really can't think of a way to prevent this without expending way more energy than necessary. And to be truthful, I like the imperfect layering; it gives the already energetic cupcakes a bit more spunk, personality and fabulous flair.

To finish the cupcakes off (and not leave them 'naked', aka muffins), we made a plain white vanilla buttercream frosting. I unfortunately do not have any decent pictures of the frosted cupcakes, so you'll just have to use your imagination. Sorry!

~The Baker's Apprentice


Saturday, April 24, 2010

THIN MINTS!

So, I've been trying to get this right since I found the recipe before Christmas. This is now my third try, and though the chocolate coating still needs massive improvement, the cookie part is nearly perfect! As my sister will tell you, words cannot describe how happy I was when I got the cookie part right. I may or may not have done a little victory dance in our kitchen... Also, this makes roughly 5 dozen cookies, give or take, so be prepared. That may sound like a lot, but in our house, they didn't even last 12 hours. Now THAT'S impressive. And it might be why our housemates are convinced that my co-baker and I are plotting to fatten them up for some evil fate.

Ingredients:
1 cup and 3 tablespoons butter, softened
1/2 cup white sugar
2/3 cup brown sugar
1 egg
1 3/4 teaspoon peppermint OIL! (Oil might be painful to find, but it's much better than extract, quality-wise. You can use extract in a pinch, but definitely up the amount used).
2 teaspoons vanilla
1 3/4 cup All-purpose flour
1/3 cup and 1 tablespoon cocoa powder
1/2 teaspoon baking soda
1/4 teaspoon salt
----
In a large bowl, cream together butter, then the sugars, then the egg. Add in the extracts, and blend for two minutes (or more).
Sift all remaining ingredients into a medium bowl, and add gradually to the wet mixture. Blend until incorporated, scraping sides with a spatula as necessary.
Freeze dough in several (about three) large balls. This is because the dough warms up and becomes gooey very rapidly, so keep whatever you're not working with in the freezer. Your
hands will thank you.
Preheat oven to 350*.
Once dough is hardened (about an hour), take out a block at a time, and roll small, 1-inch balls on to greased cookie sheets. Place the blobs about three inches apart.
With a cup dipped in cocoa powder, flatten the balls until they're about 1/4 inch thick. Bake 15-20 minutes, until the tops look dry and the cookies are firm; turn once during baking. Let cookies cool completely.

Now this next part needs work. I won't put up my proportions because 1) I don't know them precisely and 2) my version fails, and the cookies need to be frozen to not instantly melt everywhere. Oops... The trick is to get the mixture thin enough to dip well, but thick enough to harden. Chocolate only occasionally submits to my demands, and this was not one of those times, sadly.
But here's what you'll need:
Chocolate chips (probably not semi-sweet, 'cause that's what I used, and it wasn't sweet enough. Of course, at this point, you're probably well aware of my absurd sweet-tooth, but still, be warned)
Butter/Crisco
Heavy Cream
Peppermint Oil
----
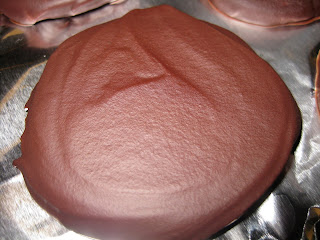
Heat the cream and butter/crisco in a double boiler. Gradually add the chocolate chips, and a small amount of the peppermint. Using a fork and wooden spoon, dip the cookies and cover completely. Set on aluminum foil to cool, then move to fridge/freezer for complete setting. Beautiful:
Noms! Happy baking.

~The Baker's Apprentice/Chef A

EDIT: The chocolate coating actually did eventually set such that they don't have to be in the freezer constantly, but I still have no idea what the proportions are. Sorry!


Wednesday, April 21, 2010

Chocolate Cake with Strawberry Frosting


I'm going to start this one off with a picture:


Okay. So my dad was coming into town, and, having not baked in a while, I asked him if he had any requests for baked goods. Chocolate-chip cookies or chocolate cake. Okay, I can work with that. I just made cookies (still playing with the recipe, get back to you on that), so I figured I should just go for a cake. (not to mention the we just got new springform pans.)

Cake start!

So the recipe I was working off of had (according to a bunch of comments) not nearly enough chocolate, so I did what any reasonable person would do, and sextupled it. So instead of a 1/2 cup of chips, I had 3. Which meant that when I was trying to make a custard out of milk/chocolate, it needed more milk. I still don't know if I would classify it as a 'custard'. Okay, here's the recipe:

Cake:

1 1/2 cups milk
3 cups semisweet choco
late chips
1/4 cup coca powder
1/2 cup butter, softened
1 1/2 cups white sugar
2 eggs
Vanilla extract
3/4 cup sour cream

1 teaspoon baking soda
1 tablespoon water
2 cups cake flour
1/2 cup powdered sugar (sifted) (optional)


Preheat your oven to 350 degrees. Grease and flour a pan of an appropriate size. (This filled our 10" springform pan quite nicely) Melt the chocolate chips with the milk, add the cocoa powder, and stir until you get a nice, smooth, thick consistency.
Cream together the butter and sugar, then add eggs, vanilla and sour cream. Mix well. Dissolve the baking soda in the water, and add it to the mixture, followed by the flour. Add the melted chocolate mixture.
At this point, taste the batter. If it's too chocolate-y, too dark for your tastes (it was for mine) mix in the powdered sugar. It lightens the taste nicely, and keeps the mixture smooth.
Pour the batter into the cake pan, and stick it in the oven!
The recipe said 40 minutes to an hour, but in our oven, when it wasn't done after an hour, I turned it up to 375 and it still took another half hour. (This is, of course, the slow oven)
Which is to say -- keep an eye on this cake after you pass the 40 minute mark, but don't expect that it won't take more than an hour.

Frosting (Strawberry):

10 oz. Strawberry Jam (or some other fruit)
fruit-flavored vodka
8 oz. cream cheese
8 oz. butter
1 cup powdered sugar
Vanilla


All of these numbers are approximate. The plan was originally to make a sacher-torte -esque fruit glaze and then chocolate ganache, so we took out the jam. And then changed our minds. So thinking quickly, we threw the jam onto the stove with a little Strawberry Vodka to thin it out, and mixed it with basic frosting-ingredients. Play around with amounts to satisfy your particular tastebuds. All you need to do is cream them all together, and taste-test. It'll be a bit thin, so refrigerate/freeze before using to thicken.

Frosting (Vanilla):

Cream-cheese
Butter
Powdered sugar

Vanilla

This was just for decoration. I throw together equal parts cream cheese and butter, and then add sugar to taste.

So, once the cake was out of the oven, Chef A cut it in half, filled it with about a third of the strawberry frosting, and then reassembled the cake, using the rest of the strawberry to cover the cake.
At this point, I came back from having lunch with my dad, took a slice for me and one for him. It was only after we had eaten them that I realized I wanted to decorate the cake better. So I threw the vanilla frosting together and piped it onto the Pac-man of cake that was left.


If I haven't said it, this cake was delicious. It's just the right mix of dense flavor and light texture, and the strawberry frosting just complements it so well. The sour cream makes it nice and moist, and there's plenty of chocolate flavor to satisfy even the most hardcore of chocoholics.

My new go-to chocolate cake recipe. (Although I have a great chocolate sheet-cake recipe I should make again)

Happy baking!

~Chef G

Sunday, April 18, 2010

Vegan Chocolate-Chip Cookie Bars

So, yesterday I helped out with a wonderful student-run festival at my university. I could go on about how awesome the whole event was, but since I imagine you're here for the recipes and not to hear about my life, I'll stick to the plan. For the event, I made vegan chocolate-chip cookies. I've never found a recipe online that I liked particularly, since I don't often have access to manufactured egg- or butter-replacers, so this I mostly just made up. Still no egg-replacer, since the store I went to - usually a dependable store for these things - didn't even stock anything of the sort. Also note, I made this recipe on the massive scale (roughly six times these amounts), and decreased that amount for you, so this is rougher than usual. I'll probably make it again soon and make actually cookies, and when I do, I'll be sure to post that version.

Ingredients:
1 2/3 cups unbleached all-purpose flour
1/2 cup nuts (I used walnuts and almonds)
2 teaspoons baking powder
1/2 teaspoon salt
1/2 teaspoon cinnamon*
1 3/4 cups vegan chocolate chips* (Trader Joe's semi-sweet chips are vegan, which are what I used)
1 c turbinado sugar
1/4 cup vegan butter substitute, room temperature (I used Earth Balance original organic)
1/4 cup unsweetened applesauce
2 teaspoons vanilla*
1/3 cup vanilla soymilk
----
Preheat oven to 350*.
Put nuts in a food processor, and blend until finely ground. I found that, once they reached a certain grain-size, that they started to stick together. Add a bit of the flour to the mix, and it should stop sticking together and grind better.
Combine flour, nut powder, baking powder, salt, and cinnamon in large mixing bowl. Form a well in the center, and set aside.
In a food processor, grind the sugar until fine.
In separate bowl, cream butter substitute and sugar, adding the applesauce gradually. Add in the vanilla and soymilk, mix again, and add to the dry ingredients, along with the chocolate chips. Mix until incorporated, but don't overmix.
Now, you can shape them into cookies, or, like me, you can make cookie cake. Either way, place them on an ungreased cookie sheet. Bake them for about 8 minutes, turn them, and bake them another 6 minutes. I warn you that our ovens bake things slowly, and these cookies will not look set when they're actually quite done. Also, these times were for the massive cookie cake, so I must apologize for how ridiculously unhelpful I am forced to be about timing. The edges should get just a little darker, and then they'll be ready to come out. If you bake them too long, they'll be quite hard and very sad.

* As usual, these are just guesstimates for how much I put in. More or less is always fine (although why you'd ever want less of tasty things is beyond me). Well, if you add too much chocolate, the bars are overwhelmed, as they were the first time I made this. Even if you love chocolate, for the love of all things holy, do not add anywhere near 3 cups of chips. Bad things happen. If you simply must, sprinkle them on top before you bake the bars.

Mmm, photo to come later.

~The Baker's Apprentice

Friday, April 2, 2010

April Fools Prank!

So, with yesterday being such a perfect day for experiment in the kitchen, I just couldn't pass up the opportunity to fool around. Our housemates have become too comfortable with the offerings frequently on the dessert table, so I figured I could play on that security, and wham 'em with something completely unexpected: adorable frosted cupcakes, with a savory base and frosting.

Oh, they were quite a success. Well, I thought so, in that they looked so innocent:
My housemates were not so amused. Luckily I made them in mini-muffin tins, so that the joke was only slightly unpleasant. For me, though, knowing off-the-bat what they were going to be, they were so tasty! The cream cheese frosting was a bit overwhelming, but if you scale it back a bit, or experiment with a savory frosting of your own, they'd be just short of perfection!

For the cupcakes:
I based the batter loosely on this recipe, but not wanting to make a pesto frosting, and also not wanting any sugar in these cupcakes, I deviated a bit. Here's what I did for the base:

3/4 cup cornmeal
1 cup AP flour
1 1/2 teaspoon baking powder
1/4 cup parmesan cheese (we had some of the shakeable powder kind, so I opted for that)
1 teaspoon salt
2 eggs, room temperature
1 cup whole milk, room temperature
4 tablespoons unsalted butter, melted
Dash olive oil (probably 1/2 teaspoon or so, just for kicks)
Dash vanilla (courtesy of Chef G, so we could claim they were "vanilla" cupcakes honestly)
~ 1/4 teaspoon each basil and sage
1 pinch rosemary
[These last four are completely up to you. I would even suggest spicing them more heavily than I did, but I didn't want them to be too aromatic and give away the joke. Also, with how much frosting I piled on them, most of the herb flavorings were covered, sadly]
----
Pre-heat oven to 350*F. Prepare 36-48 mini-muffin tins with pam, butter, oil, or whatever you so choose. I used pam, as I'm lazy.
Combine butter, milk, and eggs. Whisk well. Sift in the dry ingredients, and continue whisking. Add spices and flavorings as you'd like. Ladle batter in until they're each about 2/3 full. Bake about 18-20 minutes, until a toothpick inserted comes out clean.

Now, on to the frosting! This is definitely the area for most improvement:
8 oz. cream cheese, softened
1/2 stick butter, softened
1/2 cup bread flour
Add milk to texture. If you're piping, go for just a little bit, but if you're spreading the frosting, it'll need to be a bit thinner.
Food coloring of choice.
----
Using an electric mixer, combine the first four ingredients until they're nice and creamy. Add just a few drops (I can't stress how few drops you need. I added a bit too much, and couldn't get the right shade as a result without getting too much darker).

Let the cupcakes cool completely, and then pipe or spread the frosting on. Voila! You've got the perfect April-Fools prank.

~The Baker's Apprentice


Wednesday, March 31, 2010

Chocolate-Toffee Matzoh/Crackers for Passover!


Okay, well, I didn't actually make this for Pesach itself, but we happened to have a left-over box of matzoh in the pantry (from the last time I made this, several weeks ago) and it was just begging to be used. This is one of the easiest, tastiest recipes I have made in a really long time. But before we get to the specifics, let's take a look at the giant tray of matzoh:


Keep in mind that this is one of our lovely 16"x24" pans, nearly half gone, and I had to rush to take this picture before more people went at it.

So, the recipe (again, this covers one of our huge pans, reduce in size as you see fit -- the original, which is about half of this, calls for an 11"x17" pan):

11-12 sheets matzoh OR an equivalent amount of Saltine-like crackers
2 cups butter
2 cups packed brown sugar
kosher salt*
vanilla extract
semi-sweet chocolate chips (somewhere in the neighborhood of 2-3 cups)
nuts (optional)


Real simple here. Cover your pan with foil (there's nothing worse than caramel stuck on baking pans). The pan should have at least a little lip, to keep everything inside and together, but nothing elaborate is necessary. Lay out your sheets of matzoh or crackers on the sheet, filling all available space. Break pieces to fit if necessary. Preheat your oven to 350 F.
Melt the butter and sugar together in a saucepan until combined, and then boil for a couple of minutes. Enough to thicken it, but too long and it'll burn. Don't stress too much about it, you have a pretty wide window. Take off heat and add in the vanilla and salt. Pour it over your prepared tray of matzoh/crackers.
Stick that baby in the oven for 15-25 minutes, longer if it's larger, keeping an eye on it after you've hit 15. It'll bubble, which is fine, and when it starts to fall, that's when you know you're done or nearly so.
Pull it out of the oven and sprinkle the chips over the entire tray. You'll want enough so that the resulting chocolate can cover everything, but not so much that the dessert is entirely chocolate. Give them a couple minutes to melt from the heat of the pan, and then spread them out over the slowly cooling toffee.
If you feel the need/desire, garnish with nuts. I've seen variations with slivered almonds, chopped pecans, pistachios, and any number of other things. The choice is up to you.
Refrigerate/Freeze until it reaches a temperature you'd like to eat it at. For some people, this is ice-cream-frozen. For others, more room-temperature is ideal. Again, personal preference. Take it out, break off a piece, and enjoy!

*Add enough salt to get the taste to your liking. There's a lot of sweet here, and some salt will help balance out the flavors. Keep in mind that if you're using salted matzoh or a salty cracker, you can drastically reduce this (if not completely remove it).

~Chef G