Wednesday, March 31, 2010

Chocolate-Toffee Matzoh/Crackers for Passover!


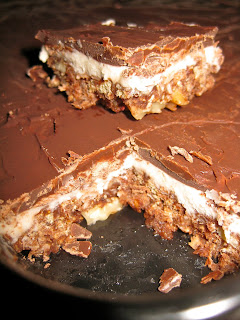
Okay, well, I didn't actually make this for Pesach itself, but we happened to have a left-over box of matzoh in the pantry (from the last time I made this, several weeks ago) and it was just begging to be used. This is one of the easiest, tastiest recipes I have made in a really long time. But before we get to the specifics, let's take a look at the giant tray of matzoh:


Keep in mind that this is one of our lovely 16"x24" pans, nearly half gone, and I had to rush to take this picture before more people went at it.

So, the recipe (again, this covers one of our huge pans, reduce in size as you see fit -- the original, which is about half of this, calls for an 11"x17" pan):

11-12 sheets matzoh OR an equivalent amount of Saltine-like crackers
2 cups butter
2 cups packed brown sugar
kosher salt*
vanilla extract
semi-sweet chocolate chips (somewhere in the neighborhood of 2-3 cups)
nuts (optional)


Real simple here. Cover your pan with foil (there's nothing worse than caramel stuck on baking pans). The pan should have at least a little lip, to keep everything inside and together, but nothing elaborate is necessary. Lay out your sheets of matzoh or crackers on the sheet, filling all available space. Break pieces to fit if necessary. Preheat your oven to 350 F.
Melt the butter and sugar together in a saucepan until combined, and then boil for a couple of minutes. Enough to thicken it, but too long and it'll burn. Don't stress too much about it, you have a pretty wide window. Take off heat and add in the vanilla and salt. Pour it over your prepared tray of matzoh/crackers.
Stick that baby in the oven for 15-25 minutes, longer if it's larger, keeping an eye on it after you've hit 15. It'll bubble, which is fine, and when it starts to fall, that's when you know you're done or nearly so.
Pull it out of the oven and sprinkle the chips over the entire tray. You'll want enough so that the resulting chocolate can cover everything, but not so much that the dessert is entirely chocolate. Give them a couple minutes to melt from the heat of the pan, and then spread them out over the slowly cooling toffee.
If you feel the need/desire, garnish with nuts. I've seen variations with slivered almonds, chopped pecans, pistachios, and any number of other things. The choice is up to you.
Refrigerate/Freeze until it reaches a temperature you'd like to eat it at. For some people, this is ice-cream-frozen. For others, more room-temperature is ideal. Again, personal preference. Take it out, break off a piece, and enjoy!

*Add enough salt to get the taste to your liking. There's a lot of sweet here, and some salt will help balance out the flavors. Keep in mind that if you're using salted matzoh or a salty cracker, you can drastically reduce this (if not completely remove it).

~Chef G

Nanaimo Bars

First off, hello! This is my first post here, so I'm rather excited. Instead of blathering on about myself or my co-cook, though, I'll get right to the goodies.

Recently, I discovered a stash of shredded coconut tucked away in the depths of our massive pantry, and I was more than excited. Oh, what to do? Since Chef G isn't a big coconut fan, I knew I didn't have to worry too much about coordinating our tastes, or cooperating, so I set out on a recipe hunt. Well, to be honest, I was surfing a food website, and stumbled upon these bars that I'd never heard of: Nanaimo Bars. They're a Canadian dessert, and though I'm not from Canada, I was terrifically excited to find out what these gorgeous bars would taste like. Just looking at the recipe, I was reminded of the super-easy seven-layer bar concoction, but after making these, I don't know if I'll ever make seven-layer bars again. This bar dessert is made up of three layers: a thick, chewy bottom crust with coconut, chocolate, and nuts, topped by a thin vanilla custard/frosting layer, all covered with chocolate.


So anyway, I based my creation off of this recipe, but due to personal preference and a lack of a few ingredients, I made modifications of my own. Firstly, here in the States, we don't have custard powder, and we didn't have any pudding powder in the pantry, so I simply added cornstarch in it's stead, and upped the vanilla extract. Additionally, we did not have enough graham crackers to make 2 cups worth of crumbs, so I used cornflakes instead (if we want to get specific, I used Special K with dried strawberries, and simply removed the strawberries before putting them through the food processor).

For the bottom layer:
1/2 cup butter, room temperature
1/3 cup granulated sugar
1/3 cup cocoa powder
1 large egg, room temperature
Vanilla*
2 cup cornflake crumbs
1 cup coconut
1/2 cup coarsely chopped walnuts (or pecans, if you'd prefer)
----
Prepare a 9x9 pan with whatever form of non-stick material you prefer. For this, I just sprayed Pam on our pan. In a saucepan, over low to medium heat, melt the butter, and then stir in sugar in cocoa. Remove the pan from stove, and then add the egg, whisking the mixture until all is uniform, and then return to stove. Cook until the mixture thickens, or about one to two minutes. Once again, remove from heat, and add the vanilla, crumbs, coconut, and chopped nuts. Stir until all are coated, at which point you should drop the mixture into the 9x9 pan, and press it down until it is flat, uniform, and there are no gaps in the crust. Cover, and refridgerate until firm, about an hour. Or, if you're impatient like me, freezing worked well for this layer.

For the middle layer:
1/4 cup butter
3 1/3 tablespoons milk
2 tablespoons cornstarch
Vanilla extract*
2 cup powdered sugar
---
Cream butter, and slowly add in the other ingredients. I started by adding the vanilla and the cornstarch, then the sugar, then the milk, but here, the order doesn't matter too terribly much. When I made this, I used 3 2/3 tablespoons milk, which resulted in a very thin - though easily spreadable - custard, so I would recommend using the reduced amount. After this, the middle layer must refrigerate to avoid chaos, havoc, and horror while adding the last layer.

For the top layer:
1 1/2 cup semisweet chocolate chips
1 tablespoon crisco/butter
---
Place in a microwave-safe bowl (I used our Pyrex measure), and melt on high for 30 seconds, then for 15 second intervals, stirring between each melt cycle. Spread the chocolate on the bars, but be warned that a too-hot chocolate will melt the custard, while chocolate that's too-cold will harden before you can spread and smooth it.


A note about vanilla (and spices): I, like my co-cook, see spice and flavoring amounts more as "guidelines," and I often nearly double the amount I put in my creations. Although this method works well for vanilla, I would not advise the "add more than called for" plan in most other aspects. As experience has shown me, it is much easier to add a bit more spice to something than it is to have to dilute flavoring. If you're still terrifically curious about the vanilla, I poured in about 1 1/2 teaspoons of vanilla for the bottom layer, and for the middle layer, a little more than 2 tablespoons went in.

~The Baker's Apprentice

Thursday, March 25, 2010

Chocolate Fudge!


So I finally came into possession of some good old-fashioned, granulated white sugar, and what was the first thing on m
y mind? Fudge. I had just made some delicious Brown-Sugar Fudge, but I was really craving that rich, creamy, but above all chocolatey taste of regular chocolate fudge. So, I whipped out my handy dandy Googling machine, and went searching for a nice, basic chocolate fudge recipe.

I found tons. But despite my new preponderance of white sugar, I didn't have any of the things these recipes wanted of me. I didn't have marshmallow creme, or chocolate chips (quickly remedied, but not before I made the fudge), or really any of the delicious staples I needed. Being in something of a time crunch, I picked one and ran with it. My result:


This recipe is the one I ended up choosing. Simple, fast, not too many ingredients, it was perfect.

Perfect except for one thing: I didn't have smooth peanut butter. Unfortunately, I didn't realize this crucial fact until the milk and sugar were on the stove. Okay, what now? Substitutes for peanut butter? Not much comes up. What I really need is another creamy, fatty, butter-like substance. That's when it hits me. How about actual butter?

It was at this point that I realized that my recipe for chocolate fudge was turning into the same recipe as my Brown-Sugar Fudge. I quickly looked up the recipe I had just used, made a few creative modifications, tasted, added chocolate, tasted, added sugar, tasted, and finally decided that this fudge was just as delicious as the brown sugar variety (if not tastier).

So, here's my modified recipe for basic Chocolate Fudge: (warning, makes a large amount of fudge. You have been warned)

1 can (12 oz) evaporated milk
4 1/2 cups white sugar
3/4 cup unsweetened cocoa powder
1 1/2 cups butter
salt*
vanilla extract*
1 1/2 cups powdered sugar (sifted)


The method here is exactly the same as before: Combine the milk, sugar, cocoa powder, butter, and salt in a saucepan over medium-high heat until the sugar dissolves and then simmer it until you reach the soft-ball stage. (You should be able to pick up a drop of the mixture after it's been dropped in cold water, but it can still squash between your fingers) Take it off the heat, and beat in the vanilla and powdered sugar with an electric beater. Pour it into a pan large enough to hold it all, and put it in the fridge to set.

Make sure you taste-test along the way -- not only is it fun and delicious, but it'll help you keep closer to your personal sugar limits. These are my own personal measurements for sugar content, but others may want to cut down on (especially) the white sugar, if not the powdered.

This is actually some of the easiest, tastiest fudge I have ever made. I'll definitely continue to play around with this recipe, but for now I'm incredibly happy with the result. Cut yourself a piece and enjoy, guys!

~Chef G

*You'll notice I don't provide measurements for salt or for vanilla extract. I'm of the school of thought that says that measurements for these things are impractical. Put enough salt in to balance out the sweet. It's not that much, but it's more than just a sprinkle. Put enough vanilla in to make it tasty. Vanilla especially is a judgment call. Don't get too hung up about teaspoons/tablespoons/soup-spoons. The baking gods are kind.

Brown Sugar Fudge


I made fudge twice in the past week, so I'll put both recipes up here. Both recipes are exceedingly simple, and all you really need to know is how to recognize candy at soft-ball During the earlier part of the week, we were entirely out of (white) granulated sugar, so in my need for sweets, I happened upon a no-white-sugar fudge recipe. Based off of this recipe, here's what I used:

1 can (12 oz) evaporated milk
4 cups packed brown sugar
3 cups butter
a generous sprinkling of salt
vanilla extract
2 cups powdered sugar (preferably sifted)

Combine the milk, sugar, butter, and salt in a saucepan over medium-high heat (stirring/whisking frequently, if not constantly) until the sugar is completely dissolved. Bring it to a boil and then reduce the heat and let it simmer for a while, stirring occasionally to prevent burning/sticking. When a drop of the mixture reaches the soft-ball stage (holds its shape when dropped in cold water, squishes between the fingers), take it off the stove and transfer to a heat-proof bowl. Beat in the vanilla and powdered sugar until smooth. Transfer to an appropriately-sized pan (mine was about 12 x 12) and spread. Cool in the fridge at least until you can cut it, then dig in!

I work in bulk(-ish) so this makes a lot of fudge. It took a house of about 34 people passing a tempting tray of fudge at least once a day almost three days to finish it all, so feel free to cut this recipe in half, or just make a lot and save it. It stays pretty moist even uncovered, but if you wrap it up, I imagine it'll keep for a couple weeks at least. (I rarely get the chance to see how long things last, but there's no way that's a problem)

This is some really sweet fudge. You're working entirely with dairy and sugar here, so there's not much to offset the rich caramel/toffee/maple/brown sugar taste. Cut into small pieces to avoid sugar-overload, or serve with something less sweet (I made a fudge sandwich with graham crackers). You can probably get away with reducing the powdered sugar at the end by a little bit; it just gives the fudge a smoother texture and a more balanced sugar flavor.

That being said, this was delicious. If I ever have an over-abundance of brown sugar (or a distinct lack of white sugar) ever again, I will default to this recipe. (It also helps that we have several cans of evaporated milk in the pantry that look really lonely). And it was super-easy. This is the kind of thing I would whip together if I had an hour or so to spare and a sweet tooth in need of sating. Definitely a winner.

Enjoy!

~Chef G

Hello!


Hey there! We're the resident sugar chefs here, and we'd like to introduce you to our favorite recipes, as we make them. Any and all sorts of baked goods, sugary treats, experimental foods, etc. are fair game. We like to get creative, and we hope to encourage everyone out there to make some delicious foods for themselves, their families, and all the people they love.
Enjoy!

~Chef G